The LoRaWAN Quest Log – Part 1: Gateway, TTN & a Sensor
This blog entry about my LoRaWAN® quest will be continued sporadically, according to how it develops. as some kind of logbook. My goal is to understand LoRaWAN® and his single parts. Especially how to integrate different sensors and actuators, how to display and do actions according to sensor data.
Knowledge base
- LoRa / LoRaWAN
- DRAGINO
- Diet-Pi
- Node-RED
- DRAGINO Notes: Route TTN Data to Node-RED
- Securing Node-RED
- Node-RED Library
- TTN
- Basics:
- Pi-Hole
Setup Gateway – LPS8 from DRAGINO
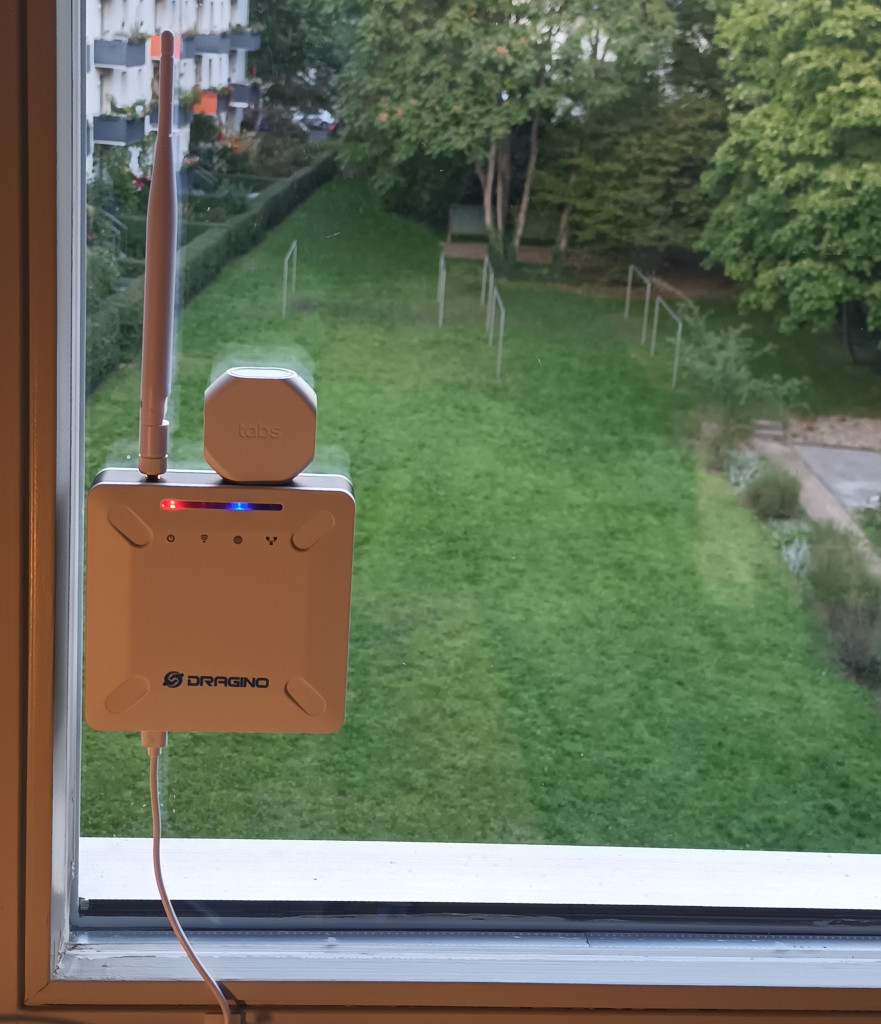
First the gateway to communicate with the sensors / actuators. I decided to use an indoor gateway from DRAGINO – the LPS8 (EU Version). Installation was easy, documentation is straight forward and good enough to set it up without any hassle:
- Download the newest firmware (Chapter 5.5.7 System → Firmware Upgrade)
- Hook UP to local computer, I decided to use the fail back method and wire up direct (Chapter 10.3)
- Connect PC’s Ethernet port to LG01’s WAN port
- Configure PC’s Ethernet port has
IP: 172.31.255.253 / Netmask: 255.255.255.252 - In the PC – connect via webbrowser to 172.31.255.254:8000
Hint: also possible to ssh in (Port: 2222)
- Flash the new Firmware (Chapter 5.5.7 System → Firmware Upgrade)
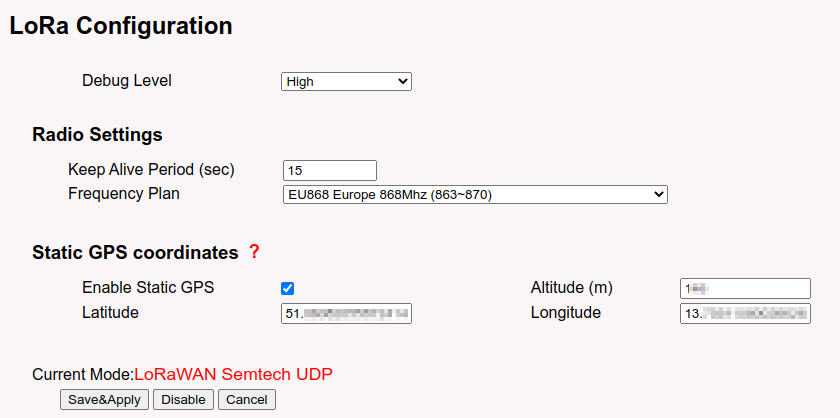
- Setup LoRa, in my Case EU frequency and – not necessary – position.
- Access the Internet (Chapter 3.3 → Access the Internet as a WiFi Client) and disable WiFi access point function (no need in my case)
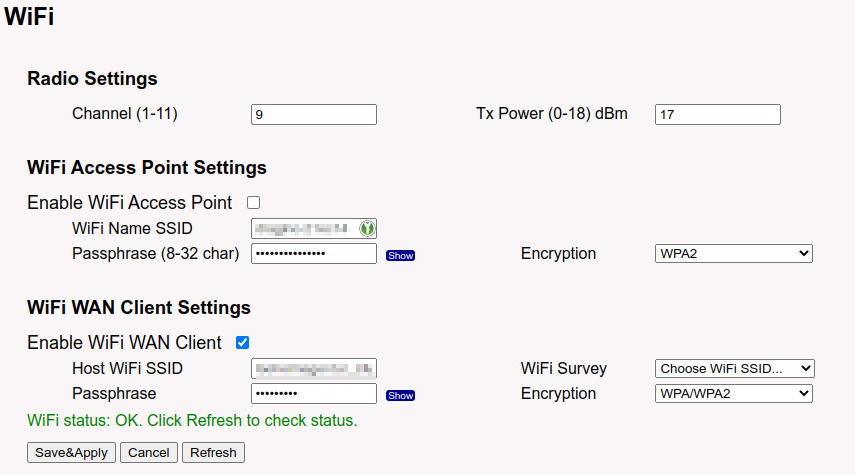
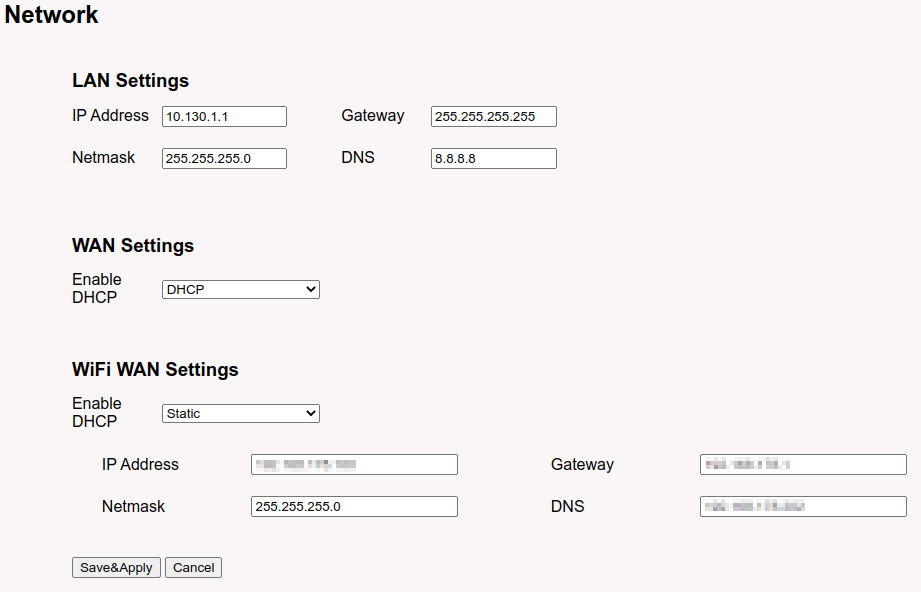
WiFi Configuration Check if Access is working (check router) In the router I also assigned a fixed IP adress as for every other hardware in my network. I left the LAN & WAN setting by default (no need) and set only the WiFI WAN Settings for my local network by changing DHCP to Static. I also pointed DNS to my piHole.
- Check if the configuration is connecting to the internet In System → System Overview, scroll down there should be Internet Connection appears as “OK” and do a first backup (System → Backup / Restore Config)
Using The Things Network
I have decided to integrate my gateway via cloud / The Things Network (TTN) . This has the advantage that also other sensors in the area can use my gateway, as I may use in the future other, more remote gateways.
To setup the gateway with the TTN just create an account and follow the instructions by TTN. In my case over the console for EU1. For more details follow the HowTo in the LPS8 Manual (Chapter 4.1 →
Create a gateway in TTN V3 Server).
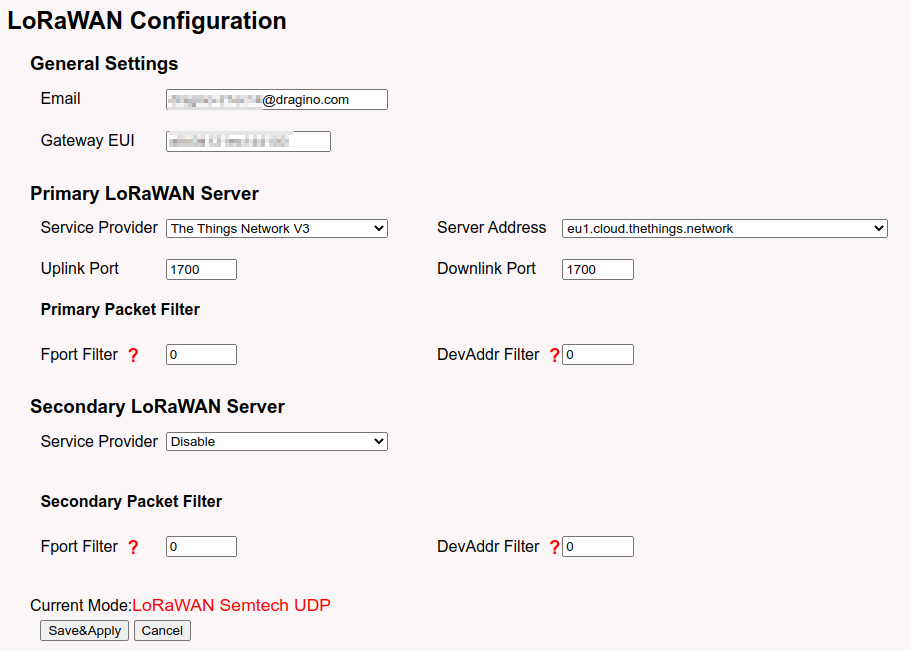
Now you have a working Gateway (don’t forget to do a Backup).
The First Sensor
A Gateway without a sensor will not bring me further. To make things easy I bought one, an Temperature / CO2 / Air Qualitiy Sensor – the TBHV110. The Sensor comes with all the information you need, including all Keys (in my case printed out with the sensor). At least you need 3 Keys: APPEUI, DEVEUI und AppKey (the Password string for encryption)
- Log into TTN / Console and setup an application (in my Case “WTS Environment Data), to this application the sensor (aka “end device”) is mapped next.
- Now follow the general instructions and add the TBHV110 sensor as an end device to this application.
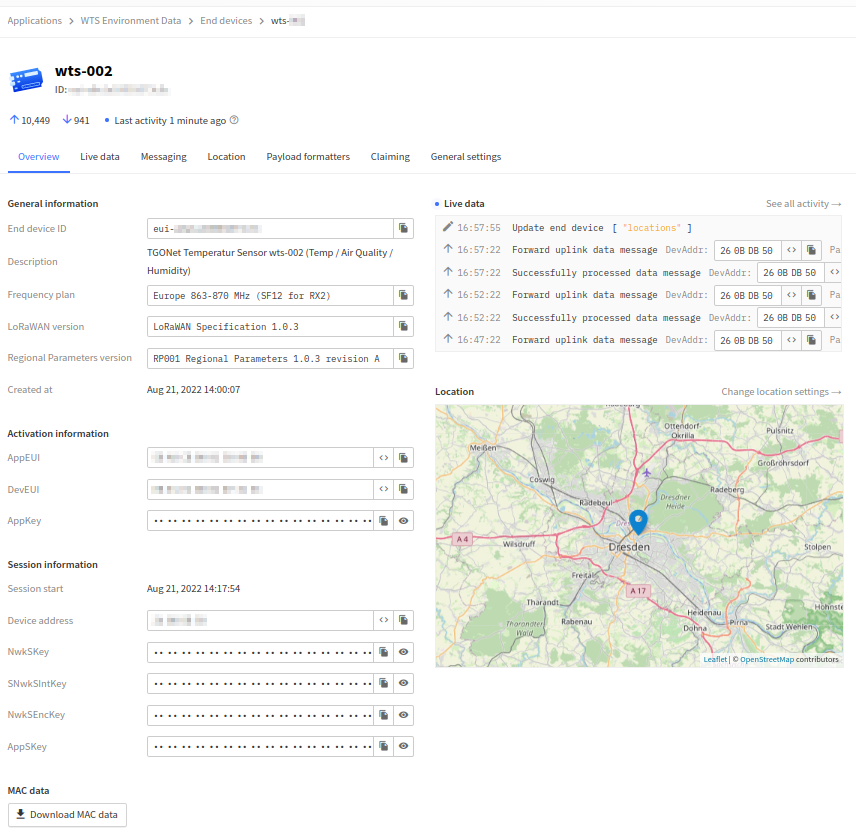
- To make things easy and the data human readable, for the TBHV110 is a payload decoder aka “Payload Formatter” available (GitHub Link) (local, for me working copy).But be careful, if you want to use Node-RED later and you want to use predefined flows for the sensor, it is better to leave the default as it is (will be filled automatically).
function decodeUplink(input) {
  return {
    data: {
      bytes: input.bytes
    },
    warnings: [],
    errors: []
  };
}
But for now: just open “Payload Formatter” and add it under Formatter Code. Hint: If you want to test the binary don’t forget to use Port 103 for the TBHV110.
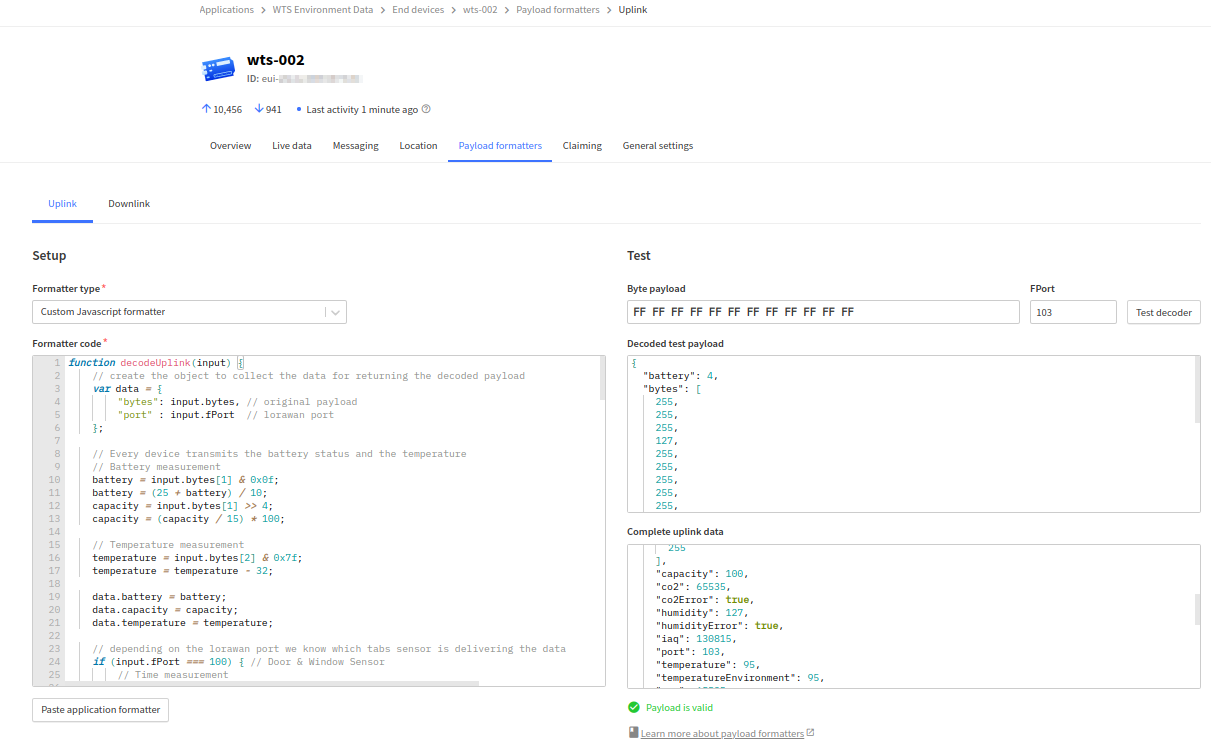
After a while, the sensor will send every 5 minutes, you will see the data. Due the payload formatter in readable values:
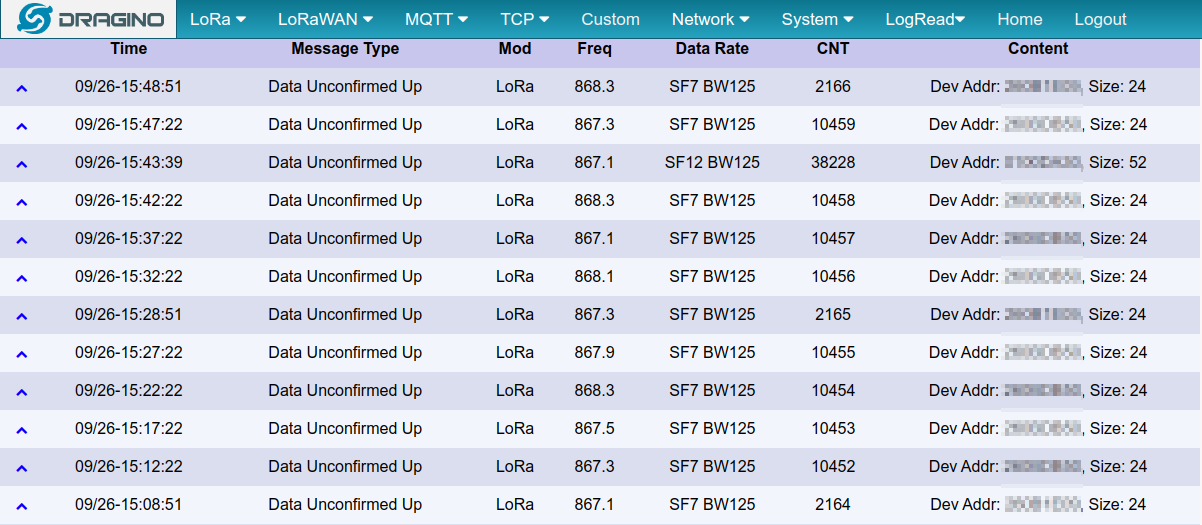
Also, if you login to your DRAGINO under Log Read / Gateway Traffic you can see the sending sensor.
⇒ Next Chapter in this quest will be the connection to Node-RED, running on a RasPi.