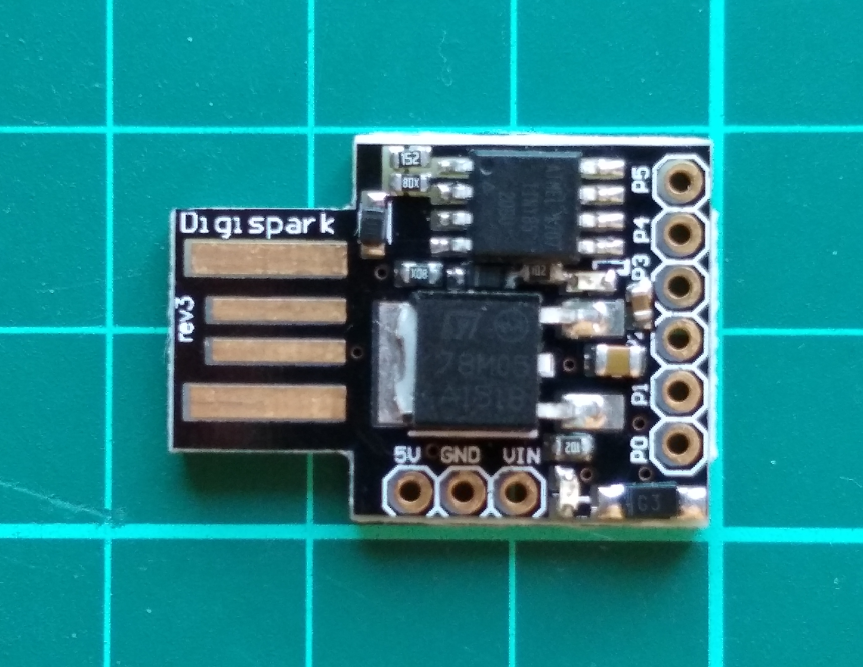
Programming a USB Digispark with Arduino IDE under Ubuntu 20.04

In my electronic grab box I suddenly found a long forgotten Digispark USB Development Board (some resources for using and connecting). But just plugging it in to my linux box under Ubuntu 20.04 didn’t work. The Arduino IDE will not see it.
A plain new Ubuntu 20.04 need some prerequisites until the IDE will connect to the Digispark.
- Install libusb-dev:
~$ sudo apt-get install libusb-dev
- udev will create a read only device, so you cannot download your code to the target. Therefore install the following udev rule “49-micronucleus.rules” in the /etc/udev/rules.d/ directory (I’m using my preferred nano as editor):
~$ sudo nano /etc/udev/rules.d/49-micronucleus.rules
copy this code into “49-micronucleus.rules”
# UDEV Rules for Micronucleus boards including the Digispark. # This file must be placed at: # # /etc/udev/rules.d/49-micronucleus.rules (preferred location) # or # /lib/udev/rules.d/49-micronucleus.rules (req'd on some broken systems) # # After this file is copied, physically unplug and reconnect the board. # SUBSYSTEMS=="usb", ATTRS{idVendor}=="16d0", ATTRS{idProduct}=="0753", MODE:="0666" KERNEL=="ttyACM*", ATTRS{idVendor}=="16d0", ATTRS{idProduct}=="0753", MODE:="0666", ENV{ID_MM_DEVICE_IGNORE}="1" # # If you share your linux system with other users, or just don't like the # idea of write permission for everybody, you can replace MODE:="0666" with # OWNER:="yourusername" to create the device owned by you, or with # GROUP:="somegroupname" and mange access using standard unix groups. - reload the rules (as root):
~$ sudo udevadm control --reload-rules
- Open the arduino IDE with and follow this instructions from here, configure the right board settings.
- Test it with the blink sketch, also from here:
// the setup routine runs once when you press reset: void setup() { // initialize the digital pin as an output. pinMode(0, OUTPUT); //LED on Model B pinMode(1, OUTPUT); //LED on Model A } // the loop routine runs over and over again forever: void loop() { digitalWrite(0, HIGH); // turn the LED on (HIGH is the voltage level) digitalWrite(1, HIGH); delay(1000); // wait for a second digitalWrite(0, LOW); // turn the LED off by making the voltage LOW digitalWrite(1, LOW); delay(1000); // wait for a second } - From the tools menu select Board→Digispark (Default – 16.5Mhz). Save und Upload. The Code output will ask you to plug in (look after the bold line):
Running Digispark Uploader...
Plug in device now... (will timeout in 60 seconds)
> Please plug in the device ...
> Press CTRL+C to terminate the program.
> Device is found!
connecting: 16% complete
connecting: 22% complete
connecting: 28% complete
connecting: 33% complete
> Device has firmware version 1.6
> Available space for user applications: 6012 bytes
> Suggested sleep time between sending pages: 8ms
> Whole page count: 94 page size: 64
> Erase function sleep duration: 752ms
parsing: 50% complete
> Erasing the memory ...
erasing: 55% complete
erasing: 60% complete
erasing: 65% complete
> Starting to upload ...
writing: 70% complete
writing: 75% complete
writing: 80% complete
> Starting the user app ...
running: 100% complete
>> Micronucleus done. Thank you!
Enjoy the power of blinking 🙂
Hint: You need to remove and replug the Digispark for each new program upload.
Resources:
-
Getting Started with your Digispark or Digispark Pro:
(https://digistump.com/wiki/digispark) - Digistump Linux Troubleshooting:
(http://digistump.com/wiki/digispark/tutorials/linuxtroubleshooting) - Connecting and Programming Your Digispark
(http://digistump.com/wiki/digispark/tutorials/connecting)