SenseBox – Basic SW Setup and OpenSenseMap
Basic Setup
The Hardware of the SenseBox is only one part. Software is the other important one, following steps are mandatory to get the SW to the Sensebox and the data to the map, well documented in the manuals & project website, installing
- Arduino IDE (I using the Linux/Ubuntu version, tested with 18.04 and 20.04)
- Set Up Libraries / Board Support Package
- After hardware test setup:
- “Hello World” & Component Check
- Firmware Update (if necessary) WiFi Bee.
In my case, the WiFi Bee firmware had a newer version than the script for creating the initial program could handle (I guess some library need to be updated). So I had to downgrade from version 19.6.1 to 19.5.4 to get it working. See also forum post.
- Create OpenSenseMap Account
- Create scetch with the generator you will find on the website. This will also logically attach sensors to right IDs (Hint: note ID = which Sensor). Sensor IDs are also now embedded in the source code, just click together, very straight forward process.
I decided to put in later the wifi access credentials.
Evereything well documented, RTFM, → read the fine manual.Wifi Credentials you will hardcode to the sourcecode:
/* ------------------------------------------------------------------------- */
/* ------------------------------Configuration------------------------------ */
/* ------------------------------------------------------------------------- */

// Wifi Credentials
const char *ssid = "$yourSSID"; // your network SSID (name)
const char *pass = "WiFiPassword"; // your network password
Upload the scetch to the MCU via Arduino IDE, for me it runs out mostly of the box, except the WiFi firmware downgrade, see point 3.B.
Display Setup
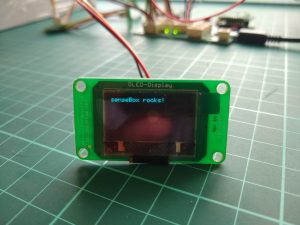
Hello World

Also well documented, just install some librarys and add some commands to your scetch, for me it worked out of the box.
Sensor Data Display
In the first try I just want the sensor data displayed. I using a more quick and dirty programming style, the experts will certainly shout about, but for the first try it works quite well.
I added subfunction “writeMeasurementsToDisplay()”, using my noted binding ID to sensor:
void writeMeasurementsToDisplay() {

// [0] => $yourSensorID ...1e5a, Temp
// [1] => $yourSensorID ...1e59, Humidity
// [2] => $yourSensorID ...1e58, Baro hPa
// [3] => $yourSensorID ...le57, Light lux
// [4] => $yourSensorID ...1e56, UV μW/cm²
// [5] => $yourSensorID ...le55, PM10 µg/m³
// [6] => $yourSensorID ...1e54, PM2.5 µg/m³

display.setCursor(0,0);
display.setTextSize(1); // small, but everything fits to display
display.setTextColor(BLACK,WHITE); // white = bluish...
display.clearDisplay();

display.println(" -=TGONet 2020 =- ");
display.setTextColor(WHITE,BLACK);
display.print("Temp : "); display.print(measurements[0].value);display.println(" grdC");
display.print("relH : "); display.print(measurements[1].value);display.println(" %");
display.print("Baro : "); display.print(measurements[2].value);display.println(" hPa");
display.print("Light: "); display.print(measurements[3].value);display.println(" lux");
display.print("UV : "); display.print(measurements[4].value);display.println(" uW/cm2");
display.print("PM10 : "); display.print(measurements[5].value);display.println(" ug/m3");
display.print("PM2.5: "); display.print(measurements[6].value); display.print(" ug/m3");
display.display();
}
You see, all the data are stored in an array, you can either try to find the right logical relationship of array position and sensor, but look at in the define / configuration part of your code, the order here determines the index for the field variable:
//...

// sensor IDs
// Temperatur
const char TEMPERSENSOR_ID[] PROGMEM = "5e8f917cdf8258001bbd1e5a";
// rel. Luftfeuchte
const char RELLUFSENSOR_ID[] PROGMEM = "5e8f917cdf8258001bbd1e59";
// Luftdruck
const char LUFTDRSENSOR_ID[] PROGMEM = "5e8f917cdf8258001bbd1e58";
// Beleuchtungsstärke
const char BELEUCSENSOR_ID[] PROGMEM = "5e8f917cdf8258001bbd1e57";
// UV-Intensität
const char UVINTESENSOR_ID[] PROGMEM = "5e8f917cdf8258001bbd1e56";
// PM10
const char PM10SENSOR_ID[] PROGMEM = "5e8f917cdf8258001bbd1e55";
// PM2.5
const char PM25SENSOR_ID[] PROGMEM = "5e8f917cdf8258001bbd1e54";


/* ------------------------------------------------------------------------- */
/* --------------------------End of Configuration--------------------------- */
/* ------------------------------------------------------------------------- */


void addMeasurement(const char *sensorId, float value) {
measurements[num_measurements].sensorId = sensorId;
measurements[num_measurements].value = value;
num_measurements++;
}
Finaly, to print it to the display, add the subfunction to the mainloop of your code. I also added DEBUG command to see it in the terminal that the mcu try to send it, but this is not necessary
void loop(){
//...
        //Display values
        DEBUG(F("LED Display values"));
        writeMeasurementsToDisplay();
//...
}
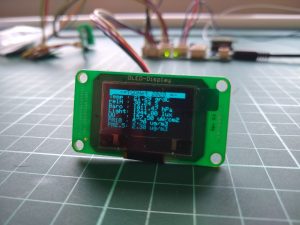
… and don’t forget to remove the hello world Example. Compile & download to MCU and I got this result, showing actual values in the display:

There is a lot to do, especailly writing and accessing data from the sc card, but for now I was happy with this result and I continued with the final setup of the hardware.